A new master
Posted: January 31, 2010 Filed under: Bathroom, Bedroom, Design, Master Bedroom, Uncategorized Leave a commentIt would have been so much easier to just slap up a new coat of paint. Unfortunately–or fortunately depending on how you look at things–we consistently get more ambitious, not less.
From the time we moved in, K & I had talked about making changes to the master bedroom. In terms of what we had to work with, for an old house, we lucked out. The master is big, a rarity in turn-of-the-century house: Walk-in closets, a large main room, an interesting wall of windows. But it also has a somewhat awkward adjoining area that was half-tucked under a dormer, half under a sloping roofline.
That awkward space though is what we pictured as a place for a master bathroom. When we showed it to friends and family, walking them through our vision, we were mostly met with raised eyebrows and skeptically nodding heads. But whatever. It wasn’t the first time people thought we had jumped the shark when it came to our renovation plans. We assured everyone that it would be cool-they just needed to understand it would be a little funky.
In fact it would have been way too funky. Strange funky, not cool funky. So at the 11th hour (meaning after I had already started demolition) we called our friend and uber-architect Matt Melcher. K had the idea of moving two walls, but we weren’t sure how it would affect the space. As usual, Matt came up with a stack of great options, and we ended up blending two based on what we thought would work. The thing is, a good architect looks at space differently. Every time we’ve worked with Matt he’s brought us ideas that we never would have thought of. This is a good thing.
I won’t completely bore you with a “woe is us” tale of living in a house during a major demolition. So here’s the short summary comparing what we thought would happen vs. what actually happened:
What we thought:
- Add in a bathroom, easily tapping into the plumbing stack in the wall between our room and our existing bathroom. Simple!
- Remove the plaster in the future bathroom only, leaving the existing plaster in the main room and closets. Replace it with water-resistant greenboard drywall
- Refinish the vertical-grain fir wood floors throughout the room
- Update our closets with new hardware
- And of course, make minor plaster repairs and repaint the rooms
- Complete the project in eight weeks, for a super-low price
What we actually did
- Removed all the plaster and lath in the entire room–every wall, ceiling, in closets, etc. And because we were living in the house while this was happening, I had the privilege of carrying out a roomful of plaster in paper grocery sacks.
- Reinsulated all exterior walls
- Moved two walls, adding in new five-panel pocket doors
- Completely rewired the upstairs, running a new “homerun” to our panel
- Had giant holes in our dining room ceiling and wall for months. These were needed to run brand new plumbing and electrical lines up from the basement
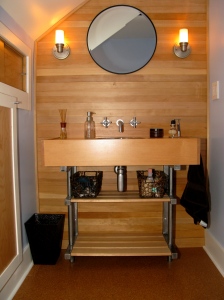
- Removed the VG fir flooring in the bathroom, replacing it with cork. We then milled down the old flooring and paneled a bathroom wall with it
- Milled down old trim, using it to build new cabinetry (very old, very beautiful wood)
- Built two completely new closets, including custom rods, maple cabinetry and lighting
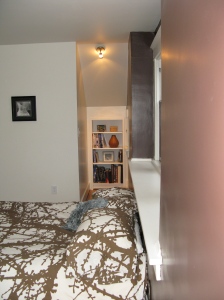
- Opened up the headboard wall to create two light wells
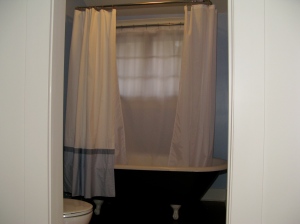
- Refinished a clawfoot tub found on craigslist that had been sitting in the carriage house of an old Kirtland Cutter mansion for the past 50 years
- Spent every weekend, all weekend for eight months working on the project. Spent a boatload of money.
- Hired Sean Smith, a.k.a. Smitty, to custom build us a set of steel brackets to support the fir sink box
Below we’ve attached a series of photos. I think these better-describe our results than the writing above. Overall, we couldn’t be happier about how things turned out. It’s a very unique space, but also in keeping with the period of the house. The interplay of light and shadow is wonderful, and having new cabinetry and high-quality fixtures in the bathroom is fantastic.
Also, despite moving the walls in, it’s impressive that the room feels substantially bigger. I think this has to do with the headboard wall extending so far beyond the closet and bathroom walls. Plus, it’s a space that’s totally appropriate for a king-size bed.
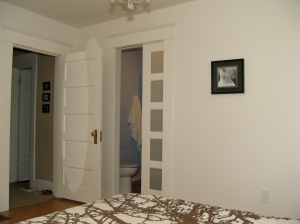
From here you can also see the new bathroom. The doors are 5-panels, with frosted glass on a pocket door track.

Yes, K likes her shoe rack. To answer the question I know you're wondering about, it's made from maple and hemlock. Also, it holds 30 pair of shoes.

We found two of these giant metal jacks at a thrift store years ago. It seemed like a more interesting doorstop than what we found at Home Depot.

For a good part of the year, it pretty much felt like we were living in a crack house. Minus the crack.


